การใช้งาน Arduino CLI#
Keywords: Arduino, Arduino CLI, Arduino ESP32, Arduino RP2040
▷ Arduino CLI#
บทความนี้นำเสนอตัวอย่างการใช้โปรแกรม Arduino CLI (Command-Line Interface) โดยปรกติแล้ว การเขียนโปรแกรม Arduino Sketch ผู้ใช้ส่วนใหญ่ ก็จะเลือกใช้ซอฟต์แวร์ Arduino IDE ทั้งแบบ Desktop (offline) และ Cloud-based (online) หรือ VS Code IDE + PlatformIO extension เป็นต้น
Arduino CLI เป็นโปรแกรมอีกตัวเลือกหนึ่ง ที่มีลักษณะการใช้งานแบบ Command-Line Tool สามารถนำมาใช้เพื่อสร้างโปรเจกต์ใหม่ คอมไพล์โค้ดและอัปโหลดไฟล์ไบนารีไปยังบอร์ดไมโครคอนโทรลเลอร์ได้ สามารถค้นหาหรือติดตั้ง Arduino Cores และโปรแกรมต่าง ๆ ที่เกี่ยวข้อง รวมถึงค้นหาและติดตั้งไลบรารีสำหรับ Arduino เป็นต้น
โปรแกรมนี้ใช้ได้กับระบบปฏิบัติการ เช่น Windows, Linux และ Mac OSX เป็นต้น การใช้งานโปรแกรมนี้ ไม่มี GUI และเหมาะสำหรับการเรียกใช้งานใน Terminal หรือ Console หรือแบบรีโมท เช่น ผ่าน Secure Shell หรือเรียกใช้งานแบบ Scripting เพื่อให้ทำงานแบบอัตโนมัติ เมื่อเรียกใช้ไฟล์สคริปต์ที่เกี่ยวข้อง
▷ การติดตั้งและใช้งาน Arduino CLI#
ขั้นตอนการติดตั้งและใช้งาน Arduino CLI สามารถศึกษาได้จาก
https://arduino.github.io/arduino-cli/latest/installation/
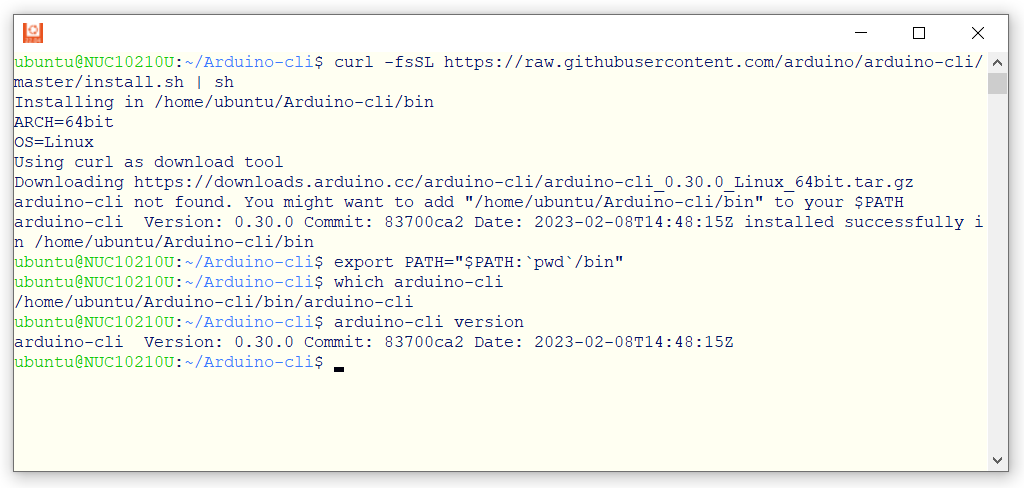
สำหรับผู้ใช้ Linux / Ubuntu มีขั้นตอนดังนี้ (ทดลองใช้ Arduino CLI เวอร์ชัน v0.30)
# Install from github
$ curl -fsSL \
  https://raw.githubusercontent.com/arduino/arduino-cli/master/install.sh | sh

# Update the $PATH variable
$ export PATH="$PATH:`pwd`/bin"

# Show the version of Arduino CLI
$ arduino-cli version
arduino-cli  Version: 0.30.0 Commit: 83700ca2
ถ้าต้องการดู Help Messages หรือข้อความแสดงรูปแบบการใช้คำสั่งและตัวเลือกของโปรแแกรม ก็มีตัวอย่างดังนี้
# Show help messages
$ arduino-cli help core
ถ้าใช้ Windows ก็สามารถดาวน์โหลดไฟล์ไบนารี (.exe) มาใช้งานได้ง่าย โดยดาวน์โหลดมาจากไฟล์ .zip
เช่น arduino-cli_latest_Windows_64bit.zip
เมื่อดาวน์โหลดไฟล์ .zip มาแล้วแตกไฟล์ เช่น สร้างเป็นไดเรกทอรีใหม่ชื่อ C:\Tools\arduino_cli-0.30.0
ซึ่งภายในมีไฟล์ arduino_cli.exe
จากนั้นก็ให้ทำคำสั่งใน Windows PowerShell เพื่อเพิ่มรายการไดเรกทอรีสำหรับไฟล์ไบนารี arduino_cli.exe ตามตัวอย่างดังนี้
$env:Path += ";C:\Tools\arduino-cli_0.30.0"
$env:Path -split ';'
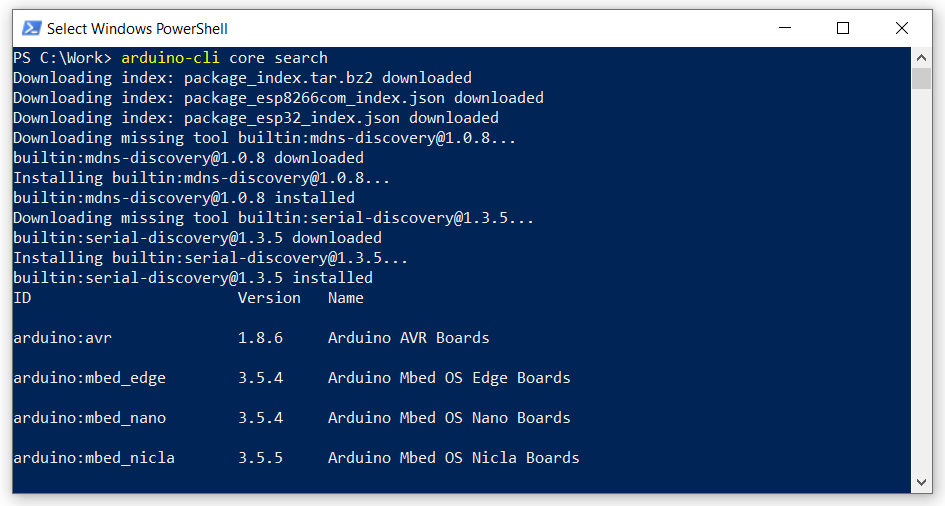
แล้วทำคำสั่งเพื่อเรียกใช้โปรแกรม
▷ ไฟล์สำหรับการตั้งค่าเพื่อใช้งาน#
ก่อนเริ่มต้นใช้งาน แนะนำให้สร้างไฟล์สำหรับตั้งค่าใช้งาน (Configuration File)
ซึ่งเป็นไฟล์แบบ YAML ("YAML Ain't Markup Language")
ถ้าเป็น Ubuntu Linux ไฟล์นี้จะถูกสร้างขึ้นและเก็บไว้ในไดเรกทอรี $HOME/.arduino15/
ภายใต้ไดเรกทอรีของผู้ใช้ (User's Home Directory)
# Create a config file written to $HOME/.arduino15/arduino-cli.yaml
$ arduino-cli config init
แต่ถ้าเป็น Windows จะได้ไฟล์ในไดเรกทอรีต่อไปนี้
Windows PowerShell:
"$($env:UserProfile)\AppData\Local\Arduino15\""$env:USERPROFILE\AppData\Local\Arduino15\"
หรือ Windows Command Prompt (cmd.exe):
"%USERPROFILE%\AppData\Local\Arduino15\"
เมื่อทำคำสั่งแล้ว จะได้ไฟล์ใหม่ที่มีชื่อว่า arduino-cli.yaml และลองแสดงตัวอย่างข้อความในไฟล์ดังกล่าว
สำหรับ Linux Ubuntu (แสดงเฉพาะสองบรรทัดแรก)
# Show the first two lines of $HOME/.arduino15/arduino-cli.yaml
$ cat $HOME/.arduino15/arduino-cli.yaml | head -n 2
board_manager:
  additional_urls: []
ถ้าต้องการจะเพิ่มรายการ Arduino Cores เช่น สำหรับบอร์ดไมโครคอนโทรลเลอร์
ESP8266 และ ESP32 มีดังนี้ โดยเพิ่มในส่วนที่มีชื่อว่า
board_manager: ในห้วข้อย่อย additional_urls:
# Add 3rd party cores
$ nano $HOME/.arduino15/arduino-cli.yaml

board_manager:
  additional_urls:
    - https://arduino.esp8266.com/stable/package_esp8266com_index.json
    - https://raw.githubusercontent.com/espressif/arduino-esp32/gh-pages/package_esp32_index.json
    - https://github.com/earlephilhower/arduino-pico/releases/download/global/package_rp2040_index.json
บันทึกการเปลี่ยนแปลงลงไฟล์ โดยกด Ctrl+o กด Enter แล้วกด Ctrl+x เพื่อจบการทำงานของ nano
หรือจะทำคำสั่งต่อไปนี้ ก็ได้เช่นกัน
$ arduino-cli config add board_manager.additional_urls \
  https://raw.githubusercontent.com/espressif/arduino-esp32/gh-pages/package_esp32_index.json

$ arduino-cli config add board_manager.additional_urls \
  https://github.com/earlephilhower/arduino-pico/releases/download/global/package_rp2040_index.json
จากนั้นให้ทำคำสั่งต่อไปนี้ เพื่ออัปเดตไฟล์ package_xxx_index.json สำหรับ Ardino Cores
(ไฟล์ที่เกี่ยวข้อง จะถูกดาวน์โหลดมาจากอินเทอร์เน็ต ซึ่งดูได้จากข้อความเอาต์พุตเมื่อทำคำสั่ง)
# Update the index files of Arduino cores
$ arduino-cli core update-index

Downloading index: package_index.tar.bz2 downloaded
Downloading index: package_esp8266com_index.json downloaded
Downloading index: package_esp32_index.json downloaded
Downloading index: package_rp2040_index.json downloaded
...
▷ การค้นหาและติดตั้ง Arduino Cores#
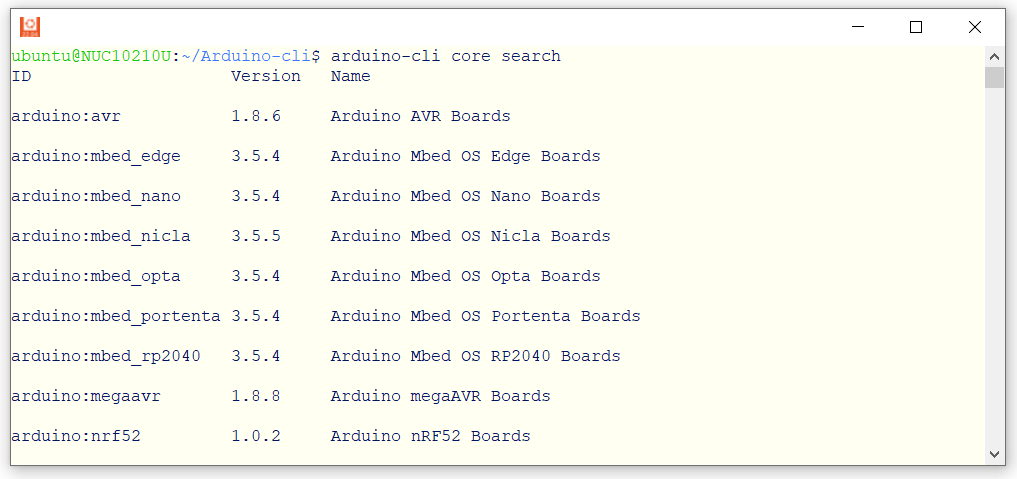
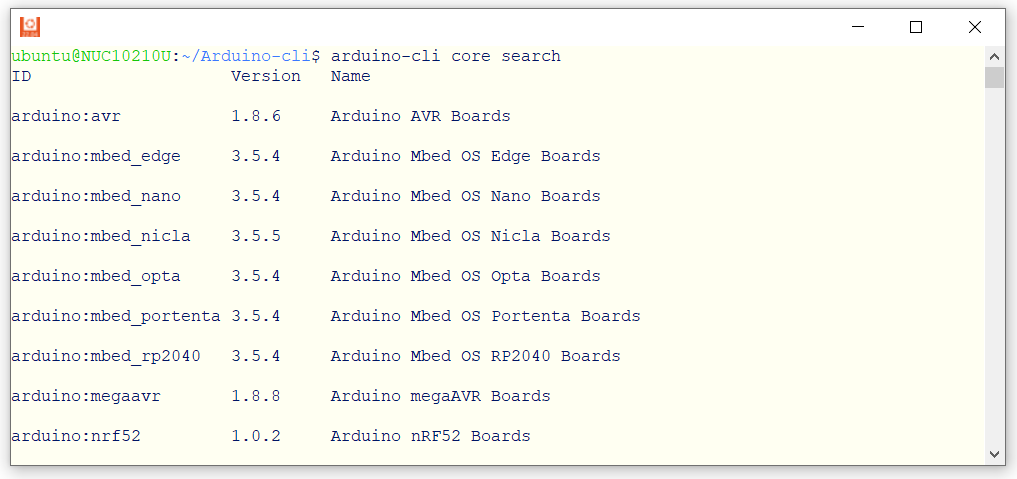
ถ้าต้องการดูรายชื่อของ Arduino Cores (พร้อมเวอร์ชันล่าสุด) ที่สามารถเลือกติดตั้งและใช้งานได้ ก็ทำคำสั่งดังนี้
# Search Arduino cores in Boards Managers
$ arduino-cli core search

ID                    Version   Name
arduino:avr           1.8.6     Arduino AVR Boards
arduino:megaavr       1.8.8     Arduino megaAVR Boards
arduino:sam           1.6.12    Arduino SAM Boards (32-bits ARM Cortex-M3)
arduino:samd          1.8.13    Arduino SAMD Boards (32-bits ARM Cortex-M0+)
....
esp32:esp32           2.0.6     esp32
esp8266:esp8266       3.1.1     esp8266
....
หรือจะใช้คำสั่งเพื่อค้นหาและแสดงรายการตามชื่อของ Arduino Core แบบเจาะจง เช่น
# Search Arduino core for AVR
$ arduino-cli core search arduino:avr
ID          Version Name
arduino:avr 1.8.6   Arduino AVR Boards

$ arduino-cli core search arduino:megaavr
ID              Version Name
arduino:megaavr 1.8.8   Arduino megaAVR Boards

# Search Arduino core for ESP8266
$ arduino-cli core search esp8266
ID              Version Name
esp8266:esp8266 3.1.1   esp8266

# Search Arduino core for ESP32
$ arduino-cli core search esp32
ID          Version Name
esp32:esp32 2.0.6   esp32
ถ้าต้องการติดตั้ง Arduino Core และโปรแกรมต่าง ๆ ที่เกี่ยวข้อง
ก็ให้ทำคำสั่ง arduino-cli core install <core>
โดยที่ <core> หมายถึง ชื่อของ Arduino Core
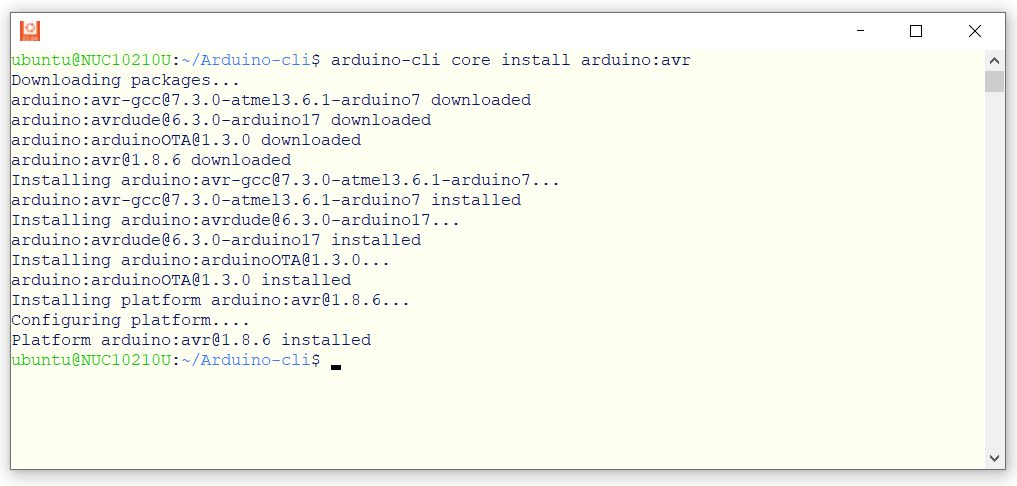
ตัวอย่างการติดตั้งสำหรับบอร์ด AVR มีดังนี้ (และตัวอย่างข้อความเอาต์พุตเมื่อทำคำสั่ง)
# Install Arduino cores for AVR and corresponding tool dependencies.
$ arduino-cli core install arduino:avr

Downloading packages...
arduino:avr-gcc@7.3.0-atmel3.6.1-arduino7 downloaded
arduino:avrdude@6.3.0-arduino17 downloaded
arduino:arduinoOTA@1.3.0 downloaded
arduino:avr@1.8.6 downloaded
Installing arduino:avr-gcc@7.3.0-atmel3.6.1-arduino7...
arduino:avr-gcc@7.3.0-atmel3.6.1-arduino7 installed
Installing arduino:avrdude@6.3.0-arduino17...
arduino:avrdude@6.3.0-arduino17 installed
Installing arduino:arduinoOTA@1.3.0...
arduino:arduinoOTA@1.3.0 installed
Installing platform arduino:avr@1.8.6...
Configuring platform....
Platform arduino:avr@1.8.6 installed
สำหรับบอร์ด ESP8266 และ ESP32
# Install Arduino cores for ESP32 and ESP8266
$ arduino-cli core install esp32:esp32
$ arduino-cli core install esp8266:esp8266
สำหรับบอร์ด RP2040 (Arduino-Pico core)
$ arduino-cli core install rp2040:rp2040
ถ้าต้องการอัปเดต Arduino Cores ที่ได้ติดตั้งไว้แล้ว ให้เป็นเวอร์ชันล่าสุด ให้ทำคำสั่งต่อไปนี้
# Upgrade one or all installed Arduino cores to the latest version.
$ arduino-cli core upgrade
หรือจะอัปเดตเฉพาะบางรายการ เช่น สำหรับ Arduino Core for ESP32
$ arduino-cli core upgrade esp32:esp32
เมื่อได้ติดตั้ง Arduino Cores ที่ได้เลือกใช้งานแล้ว ถัดไปก็เป็นคำสั่งเพื่อดูรายการบอร์ดไมโครคอนโทรลเลอร์
ที่สามารถเลือกใช้ได้ โดยใช้คำสั่ง
arduino-cli board listall <board> โดยที่ <board> หมายถึง ชื่อบอร์ด
และ Arduino จะใช้ชื่อในรูปแบบที่เรียกว่า FQBN (Fully Qualified Board Name)
# List supported Arduino boards and their FQBN strings
$ arduino-cli board listall arduino
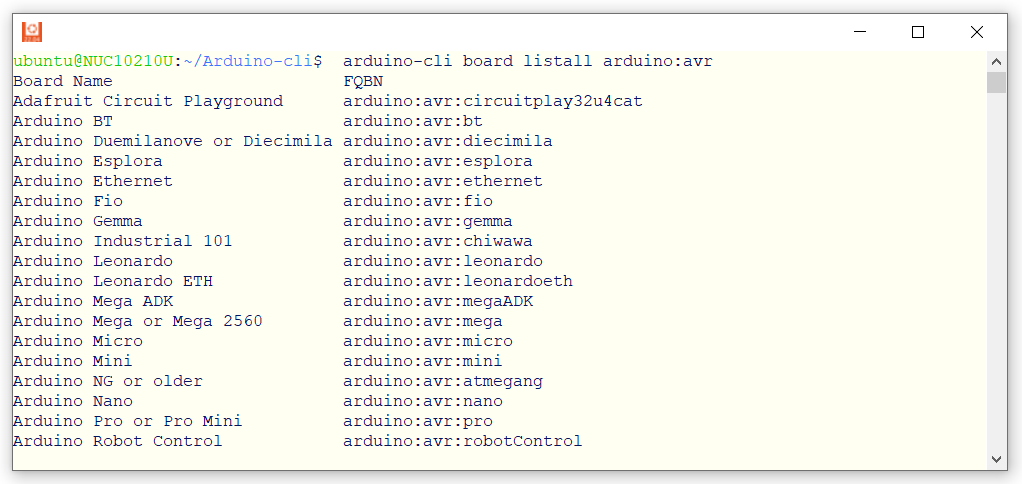
หรือเจาะจงเฉพาะบอร์ด arduino:avr
# List only Arduino-AVR boards
$ arduino-cli board listall arduino:avr

Board Name                       FQBN
Arduino Leonardo                 arduino:avr:leonardo
Arduino Mega or Mega 2560        arduino:avr:mega
Arduino Micro                    arduino:avr:micro
Arduino Mini                     arduino:avr:mini
Arduino Nano                     arduino:avr:nano
Arduino Pro or Pro Mini          arduino:avr:pro
Arduino Uno                      arduino:avr:uno
...
$ arduino-cli board listall arduino:megaavr

Board Name            FQBN
Arduino Nano Every    arduino:megaavr:nona4809
Arduino Uno WiFi Rev2 arduino:megaavr:uno2018
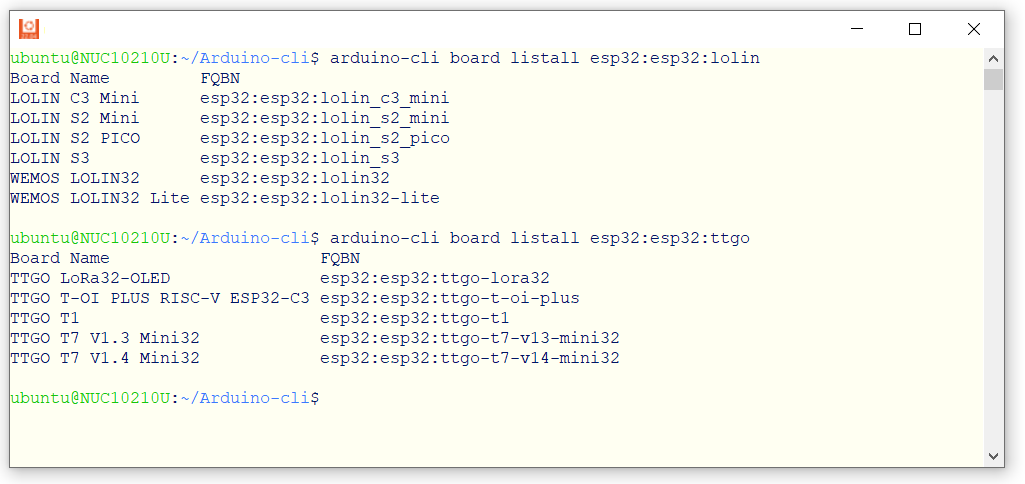
แสดงรายการบอร์ดไมโครคอนโทรลเลอร์ที่ใช้ชิป ESP32 ของ WeMos Lolin
$ arduino-cli board listall esp32:esp32:lolin
▷ การค้นหาและติดตั้ง Arduino Libraries#
คำสั่งสำหรับค้นหาไลบรารี ตามชื่อที่ระบุ สามารถทำได้ตามตัวอย่างดังนี้ เช่น
ค้นหาและแสดงรายการที่มีชื่อเริ่มต้นด้วย
Adafruit
$ arduino-cli lib search --names | grep -P "^Name: \"Adafruit.+\""

Name: "Adafruit 10DOF"
Name: "Adafruit 9DOF"
Name: "Adafruit ADS1X15"
Name: "Adafruit ADXL343"
Name: "Adafruit ADXL345"
Name: "Adafruit ADXL375"
...
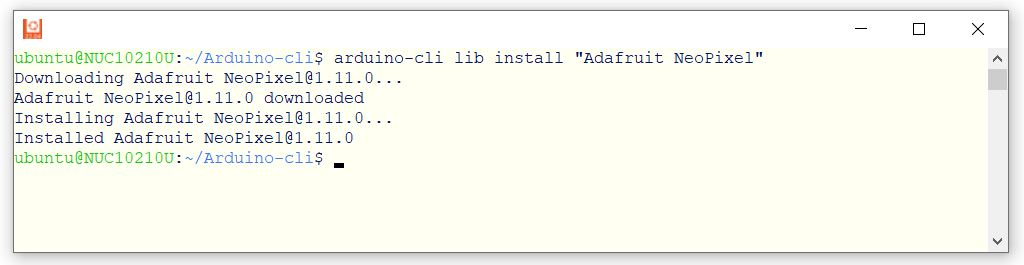
ถ้าจะติดตั้งไลบรารี ก็ให้ทำคำสั่งในลักษณะนี้
arduino-cli lib install <lib>
โดยที่ <lib> เป็นชื่อไลบรารี
เช่น ติดตั้งไลบรารี Adafruit NeoPixel
▷ การสร้างและคอมไพล์ Arduino Sketch#
เริ่มต้นด้วยการสร้างโปรเจกต์สำหรับ Arduino Sketch เช่น ใช้ชื่อว่า esp32_blink
ซึ่งจะได้ไฟล์ชื่อ ./esp32_blink/esp32_blink.ino
# Set Arduino sketch name
$ SKETCH_NAME=esp32_blink

# Create a new Arduino sketch with the specified name
$ arduino-cli sketch new $SKETCH_NAME
จากนั้นเขียนโค้ดลงในไฟล์ ./esp32_blink/esp32_blink.ino เช่น
#include <Arduino.h>

void setup() {
  Serial.begin( 115200 );
  pinMode( LED_BUILTIN, OUTPUT );
}

void loop() {
  static uint32_t state = 0;
  digitalWrite( LED_BUILTIN, state ^= 1 );
  Serial.printf( "LED state: %d", state );
  delay(500);
}
แล้วคอมไพล์โค้ด โดยเลือกบอร์ดไมโครคอนโทรลเลอร์เป็น esp32:esp32:lolin32
และให้ไดเรกทอรี build สำหรับเก็บไฟล์เอาต์พุตที่ได้จากการคอมไพล์โค้ด
$ arduino-cli compile --fqbn esp32:esp32:lolin32 \
  --build-path $SKETCH_NAME/build $SKETCH_NAME
เมื่อคอมไพล์ได้สำเร็จแล้ว ลองดูไฟล์เอาต์พุตที่ได้
$ tree -L 2 $SKETCH_NAME/

esp32_blink/
├── build
│   ├── build_opt.h
│   ├── build.options.json
│   ├── compile_commands.json
│   ├── core
│   ├── esp32_blink.ino.bin
│   ├── esp32_blink.ino.bootloader.bin
│   ├── esp32_blink.ino.elf
│   ├── esp32_blink.ino.map
│   ├── esp32_blink.ino.partitions.bin
│   ├── includes.cache
│   ├── libraries
│   ├── libraries.cache
│   ├── partitions.csv
│   ├── preproc
│   └── sketch
├── debug.cfg
├── debug_custom.json
├── esp32_blink.ino
└── esp32.svd

5 directories, 15 files
ถ้าจะอัปโหลดไฟล์เฟิร์มแวร์ไปยังบอร์ด ก็ทำคำสั่งในลักษณะนี้
(ในตัวอย่างได้เลือกใช้พอร์ตหมายเลข /dev/ttyUSB0 ที่เชื่อมต่อกับบอร์ด ESP32)
$ arduino-cli upload -p /dev/ttyUSB0 \
  --fqbn esp32:esp32:lolin32 \
  --input-dir $SKETCH_NAME/build $SKETCH_NAME
ถ้าใช้ Window PowerShell ก็มีรูปแบบการทำคำสั่งดังนี้
(ในตัวอย่างได้เลือกใช้พอร์ตหมายเลข COM6 ที่เชื่อมต่อกับบอร์ด ESP32)
# Set a variable for the Sketch name
$SKETCH_NAME = "esp32_blink"

# Create a new sketch (but not overwrite)
arduino-cli sketch new $SKETCH_NAME

# Edit the Sketch file (.ino) with notepad.exe
notepad.exe "$SKETCH_NAME/$SKETCH_NAME.ino"

# Compile the sketch
arduino-cli compile --fqbn esp32:esp32:lolin32 `
  --build-path $SKETCH_NAME/build $SKETCH_NAME

# Upload the firmware file to the target board
arduino-cli upload -p COM6 `
  --fqbn esp32:esp32:lolin32 `
  --input-dir $SKETCH_NAME/build $SKETCH_NAME
▷ ตัวอย่างการเขียนสคริปต์สำหรับ Windows CMD#
เราสามารถสร้างไฟล์ build.bat ไว้ในไดเรกทอรีของโปรเจกต์ของ Arduino Sketch
แล้วทำคำสั่งต่อไปนี้ เพื่อคอมไพล์โค้ด อัปโหลดเฟิร์มแวร์ที่ได้ไปยังบอร์ดไมโครคอนโทรลเลอร์ และเชื่อมต่อกับบอร์ด
build.bat compilebuild.bat uploadbuild.bat monitor
หรือทำทั้งสามขั้นตอนตามลำดับ
build.bat compile && build.bat upload && build.bat upload
ตัวอย่างการเขียนสคริปต์ มีดังนี้
File: build.bat
@echo off
setlocal

:: Input argument
set "ACTION=%1"

:: Configuration
set "PROJECT=."
set "BUILD_PATH=build"
set "BOARD=esp32:esp32:lolin32-lite"
set "PORT=COM25"
set "BAUD=115200"

:: Show usage if no argument given
if "%ACTION%"=="" (
    echo Usage: %~nx0 ^<compile^|upload^|monitor^>
    exit /b 1
)

:: === Actions Dispatcher ===
if /i "%ACTION%"=="compile" goto :do_compile
if /i "%ACTION%"=="upload"  goto :do_upload
if /i "%ACTION%"=="monitor" goto :do_monitor

echo -------------------------------------------------
echo Unknown action: "%ACTION%"
echo Valid options: compile, upload, monitor
exit /b 1

:: === Compile Step ===
:do_compile
echo -------------------------------------------------
echo [1] Compiling the Arduino sketch...
arduino-cli compile ^
    --verbose ^
    --build-path "%BUILD_PATH%" ^
    --fqbn "%BOARD%" ^
    "%PROJECT%"
exit /b %errorlevel%

:: === Upload Step ===
:do_upload
echo -------------------------------------------------
echo [2] Uploading firmware to target board...
arduino-cli upload ^
    -p "%PORT%" ^
    --build-path "%BUILD_PATH%" ^
    --fqbn "%BOARD%" ^
    "%PROJECT%"
exit /b %errorlevel%

:: === Monitor Step ===
:do_monitor
echo -------------------------------------------------
echo [3] Opening serial monitor
echo Use the serial port=%PORT% and baud=%BAUD%...
arduino-cli monitor ^
    -p "%PORT%" ^
    --config baudrate=%BAUD%
exit /b
ในสคริปต์ตัวอย่าง มีการระบุชื่อบอร์ดที่ต้องใช้การคือ esp32:esp32:lolin32-lite
และมีการระบุหมายเลขพอร์ตอนุกรมคือ COM25 และตั้งค่ BAUD=115200
สคริปต์ตัวอย่างนี้ ได้ทดลองใช้กับ arduino-cli เวอร์ชัน 1.2.0
▷ ตัวอย่างการเขียนสคริปต์สำหรับ Makefile#
ถัดไปเป็นตัวอย่างสคริปต์ Makefile สำหรับการใช้งานกับคำสั่ง make ภายใต้ Ubuntu Linux
โดยนำไปใส่ไว้ในไดเรกทอรีของ Arduino Sketch ที่ต้องการใช้งาน และทำคำสั่งต่อไปนี้
make compilemake uploadmake monitor
File: Makefile
# === Configurable Variables ===
SKETCH_DIR  ?= $(shell pwd)
SKETCH_NAME ?= $(notdir $(SKETCH_DIR))
BOARD_FQBN  ?= esp32:esp32:esp32
PORT        ?= /dev/ttyUSB0
BAUD        ?= 115200

# === Commands ===
CLI := arduino-cli

# === Sketch Info ===
SKETCH_NAME := $(notdir $(SKETCH_DIR))
BUILD_DIR   := $(SKETCH_DIR)/build

# === Targets ===
.PHONY: all create compile upload monitor clean

all: compile upload

create:
    @echo "Creating sketch in $(SKETCH_DIR)..."
    $(CLI) sketch new $(SKETCH_DIR)

compile:
    @echo "Compiling sketch and source files in $(SKETCH_DIR)..."
    $(CLI) compile --verbose --fqbn $(BOARD_FQBN) \
        --build-path $(BUILD_DIR) $(SKETCH_DIR)

upload:
    @echo "Uploading to board on $(PORT)..."
    $(CLI) upload -p $(PORT) --fqbn $(BOARD_FQBN) \
        --input-dir $(BUILD_DIR)

monitor:
    @echo "Starting serial monitor on $(PORT)..."
    $(CLI) monitor -p $(PORT) -c baudrate=$(BAUD) \
        --fqbn $(BOARD_FQBN)

clean:
    @echo "Cleaning build directory..."
    rm -rf $(BUILD_DIR)
ถ้าใช้กับอุปกรณ์ เช่น ESP32-C3 หรือ ESP32-S3 และตั้งค่าตัวเลือกในการคอมไพล์ เช่น การเปิดใช้งาน USB-CDC ก็มีตัวอย่างคำสั่ง ดังนี้
compile:
    @echo "Compiling sketch and source files in $(SKETCH_DIR)..."
    $(CLI) compile --verbose --fqbn $(BOARD_FQBN) --build-property \
    "build.extra_flags=-DARDUINO_USB_MODE=1 -DARDUINO_USB_CDC_ON_BOOT=1" \
    --build-path $(BUILD_DIR) $(SKETCH_DIR)
ในกรณีที่ใช้ WSL 2 / Ubuntu สำหรับระบบปฏิบัติการ Windows 10 / 11
การเข้าถึงอุปกรณ์ USB จาก Ubuntu จะทำได้หลังจากได้ติดตั้งโปรแกรมที่เรียกว่า
usbipd-win
ดูรายละเอียดการติดตั้งและใช้งานได้จาก "WSL - Connect USB devices"
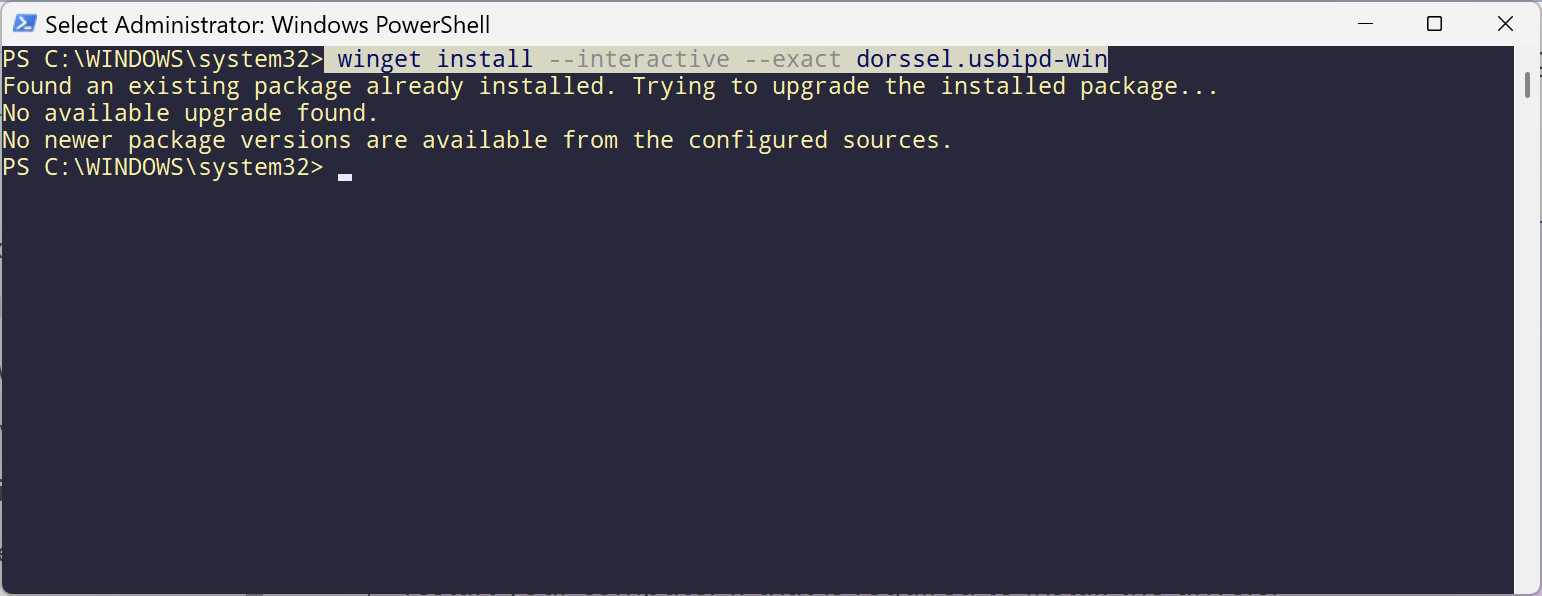
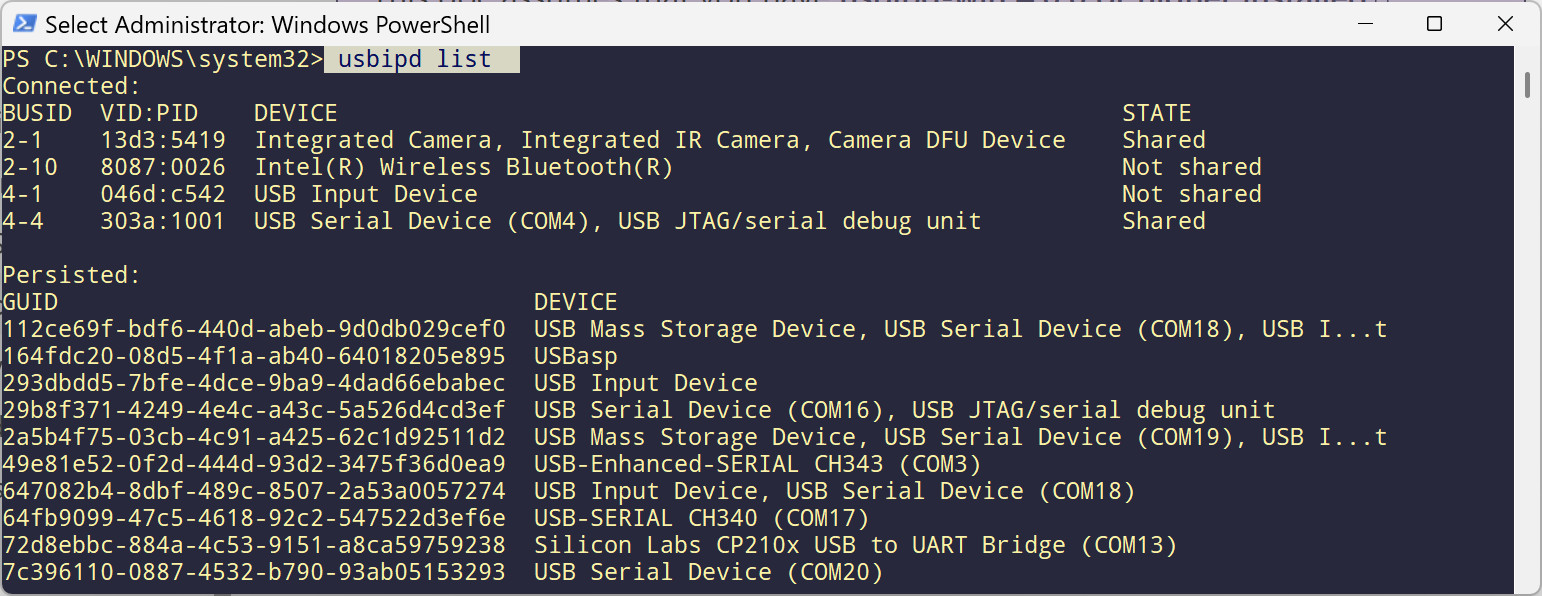
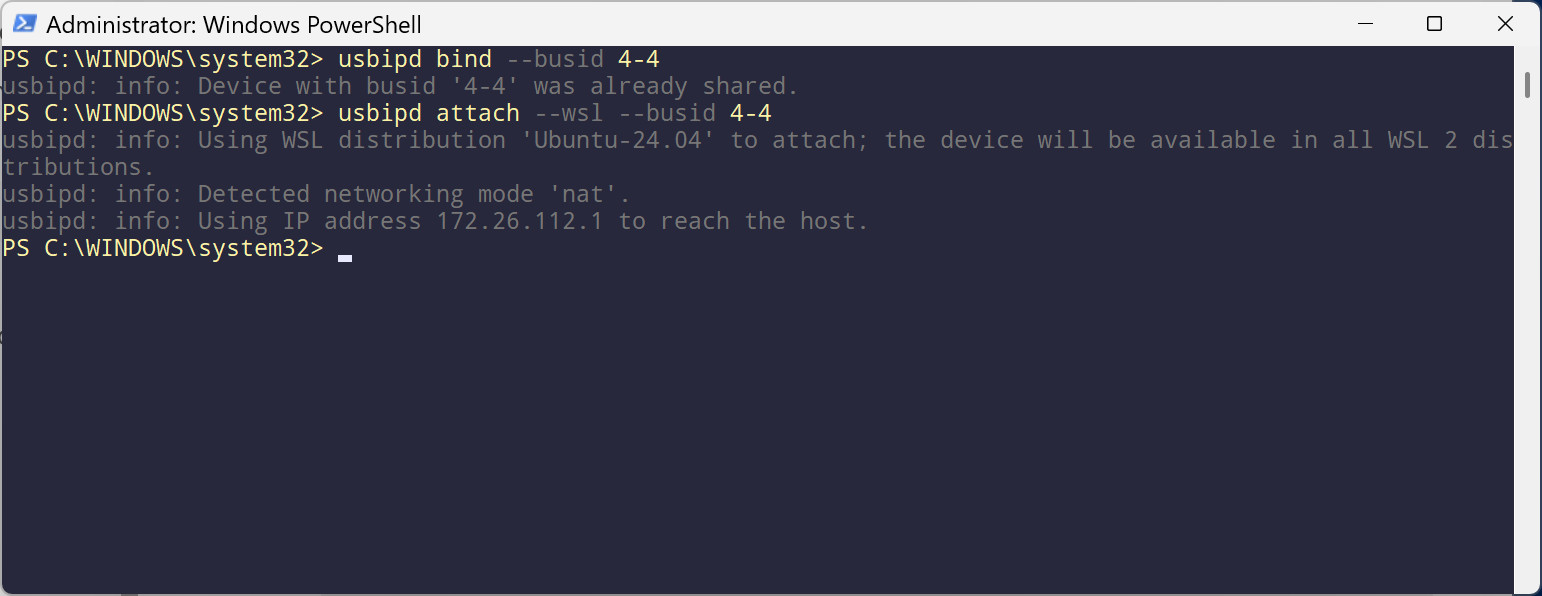
รูป: ตัวอย่างการทำคำสั่งสำหรับ usbipd-win สำหรับ Windows 11 (PowerShell in administrator mode)
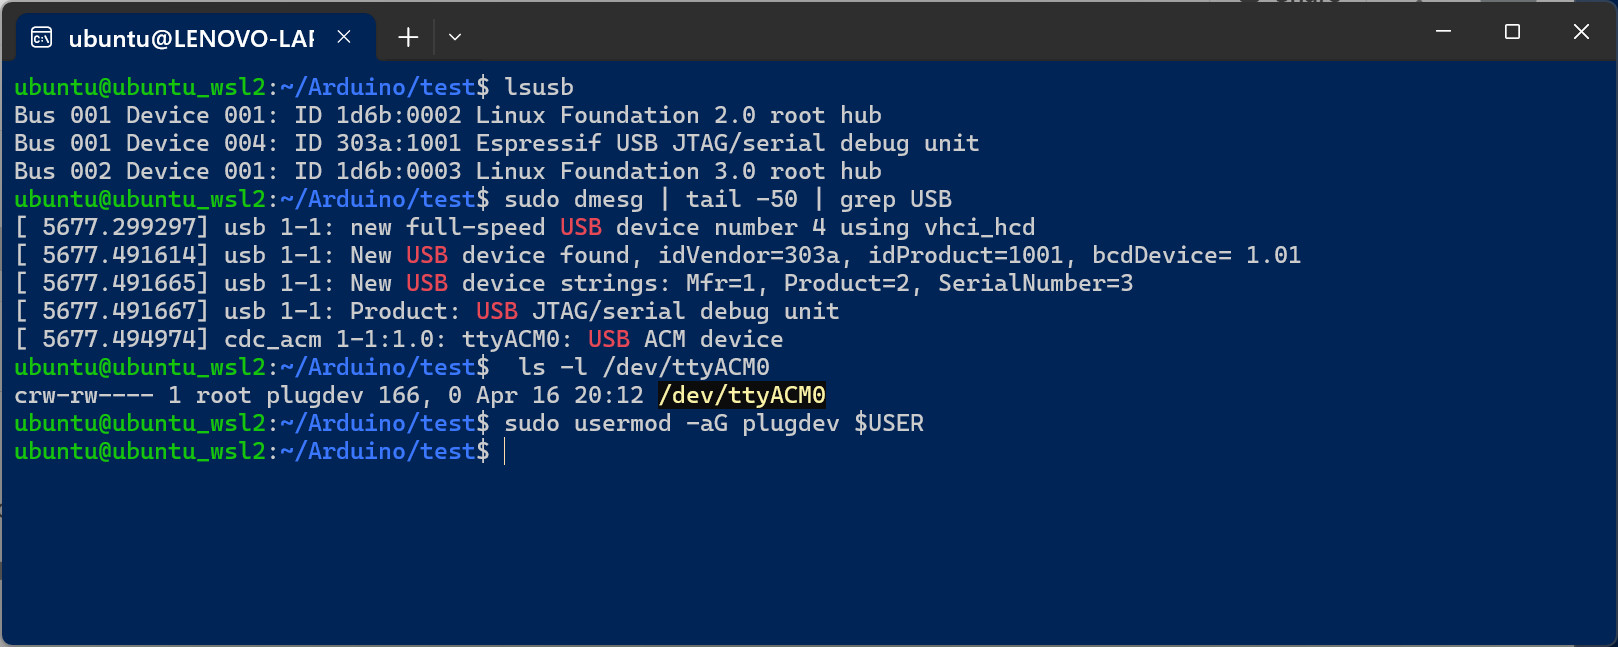
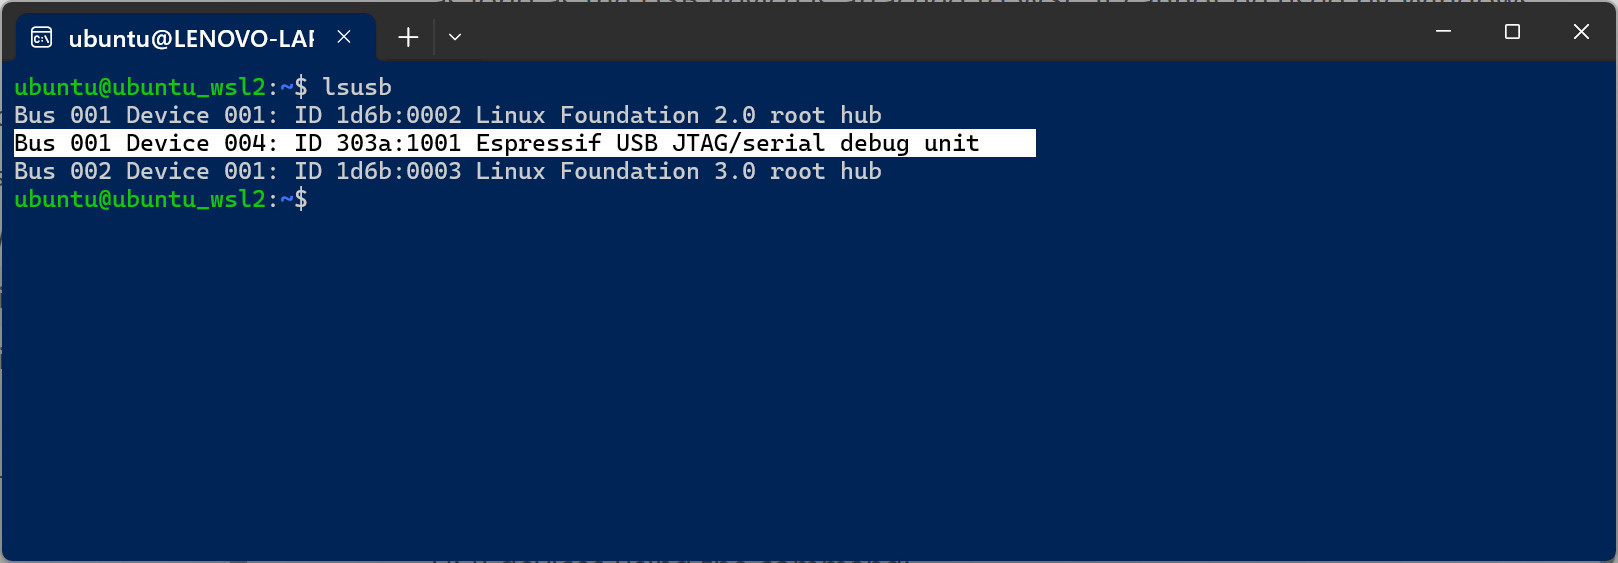
รูป: ตัวอย่างการทำคำสั่ง lsusb และ dmesg เพื่อตรวจสอบดูว่า สามารถมองเห็นบอร์ด ESP32 ภายใต้ WSL 2 / Ubuntu
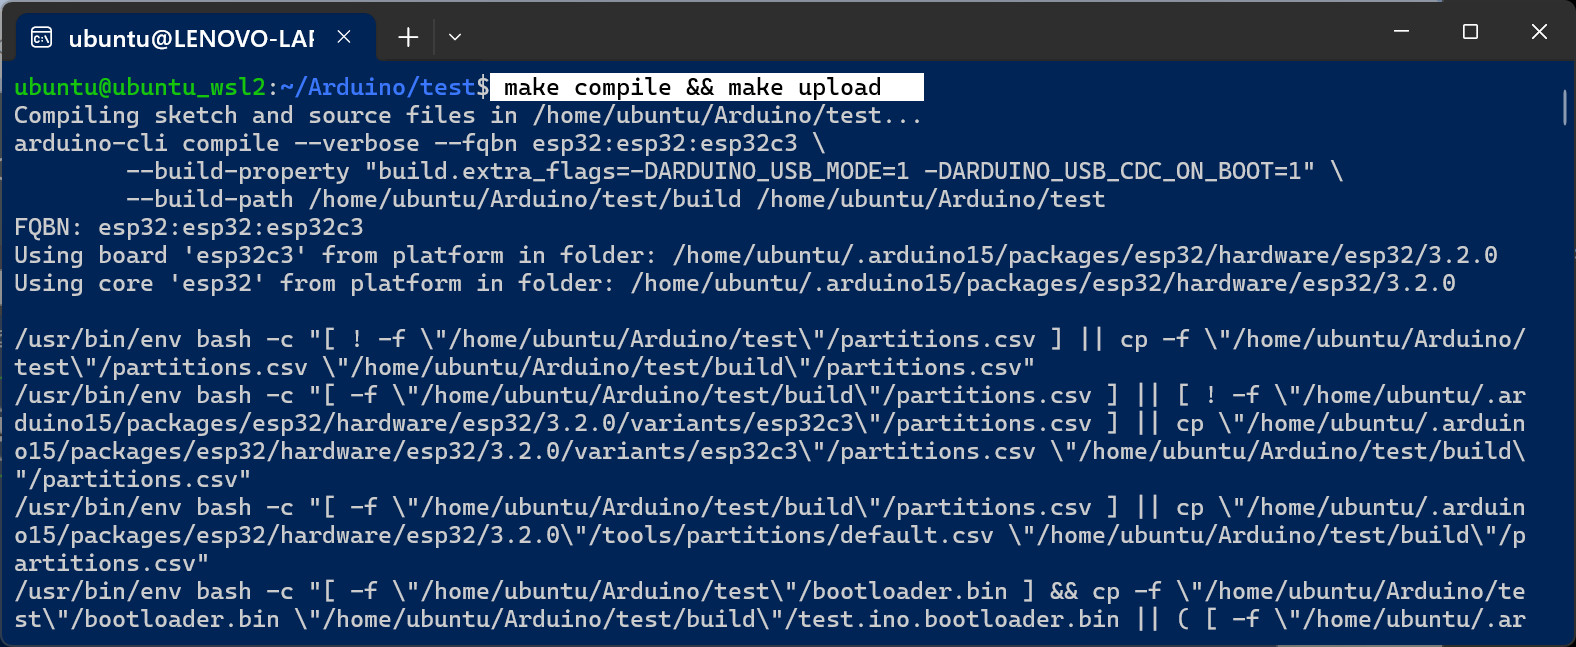
รูป: ตัวอย่างการทำคำสั่ง make เพื่ออัปโหลดไฟล์ Arduino Sketch ไปยังบอร์ด ESP32
ข้อสังเกต: การเข้าถึงหรือใช้พอร์ต USB-CDC ของ ESP32C3 / ESP32S3 เมื่อมีการอัปโหลดทุกครั้ง บอร์ดจะถูกรีเซต
แล้วจะมองไม่เห็นอุปกรณ์ใน WSL 2 / Ubuntu ดังนั้นจะต้องทำคำสั่ง usbipd attach --wsl --busid 4-4 ใน PowerShell อีกครั้งก่อน
▷ กล่าวสรุป#
บทความนี้ได้นำเสนอตัวอย่างการใช้คำสั่งของ Arduino CLI ในเบื้องต้น ซึ่งเป็นเครื่องมือแบบ Command Line Tools ที่ใช้ในการคอมไพล์โค้ดสำหรับ Arduino Sketch มีการสาธิตการทำคำสั่งสำหรับ Ubuntu Linux และ Windows PowerShell มีตัวอย่างการเขียนสคริปต์สำหรับ Windows และ Ubuntu เพื่อคอมไพล์โค้ดและอัปโหลดไฟล์ที่ได้ยังบอร์ดไมโครคอนโทรลเลอร์
This work is licensed under a Creative Commons Attribution-ShareAlike 4.0 International License.
Created: 2023-02-15 | Last Updated: 2025-04-16